Clean gravel is essential as all gravel has some debris, Particles dust grit, and chemicals in the dye for instance! Even PRE”CLEANED” – PRE”WASHED” needs clean-washed gravel there are some hobbyists and manufacturers that are
of the opinion that pre-rinsed gravel as sold is fine to use as sold and the filters will remove any and all dust, and debris over time this is of cause only partially true. Yes, the filter will remove some but not all, and what about the toxins in the chemicals and the dye from Coloured gravel?

The truth is your filters will NOT be able to remove all the debris and dust let alone the toxins in the chemicals and dye this will only result in harm to your FISH!
You will see if you have a problem with gravel as the dust plume will be kicked up of the gravel’s surface and into the water column making the waters cloudy so does aquarium gravel need washing?
YES and here is how poor the gravel into a large sieve just halfway then fill the rest with water “obviously over a clean bucket” while pouring the water shake the sieve to agitate whilst letting the water pass over the gravel and back out into the bucket! Keep refilling water over the gravel within the sieve until the water runs clear this may take a few goes once done you have clean gravel ready for dechlorination.
Now we know that all gravel needs cleaning before we can place it into our tanks! But did you know we also need to clean or hoover our gravel periodically too we will talk more about this here in a bit but first why do we even need to use gravel or any substrate for that matter?
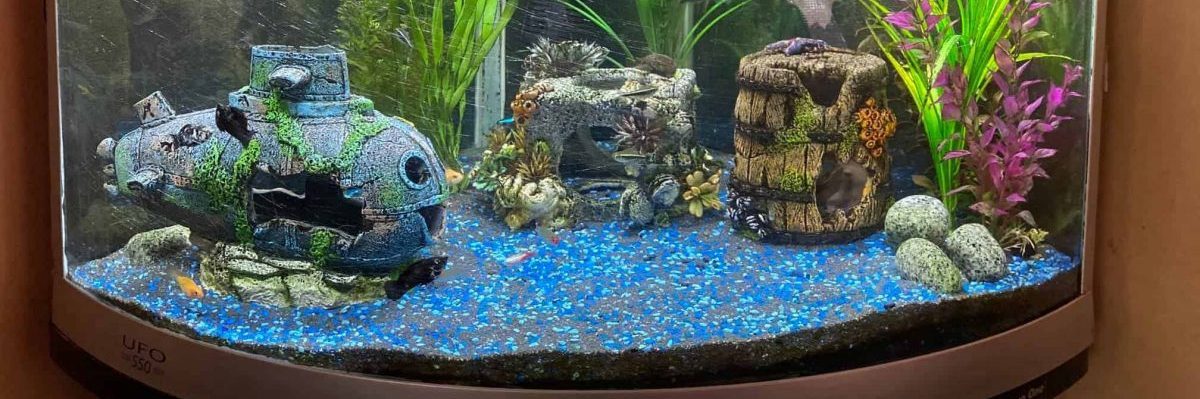
WHY USE GRAVEL/SUBSTRATE ANYWAY?

Well, we do indeed need gravel or at least some substrate it serves a few purposes let me explain, First it provides a place for our friendly bacteria to grow which is the process of biological filtration!
in simple terms this “biological filtration” is where the gravel houses good bacteria that help to get rid of all the bad bacteria or more commonly known as nitrite and ammonia which are made from things such as wee, poo, leftover food waste plant matter, etc you get the drift.
Also, you will definitely need gravel or another substrate if you have any bottom feeders and or fish that like to eat play, or hide within the substrate! Let’s face it most fish love playing in the gravel burrowing hiding etc. Most fish will pick up bits of gravel after feeding and spit it out again seems to aid with digestion.
Not to mention bare bottom tanks are a risk for ammonia spikes but will ultimately cause unwanted stress to our little fishy friends this because there would be no hiding places and even something as simple as seeing a reflection of the glass bottom can make a fish nervous or even aggressive.
also, let’s be honest how boring bare bottom tanks scaping no plants no style or panache! Come on people a little decor with some gravel and stones and plants goes a long way am I right yep it looks so much better for both the fish and for us looking in on them!
CLEANING OUR GRAVEL THE RIGHT WAY!
First, we will need a few things to properly clean our gravel this is the process of cleaning our gravel before putting it into our tanks ok let’s begin here is a list of what’s needed!
- Gravel I know right
- Rubber gloves
- 2 Buckets
- Sieve 6 inches across
- Hose and running water
- Dechlorinator
- Somewhere to throw dirty water (don’t throw down sinks)

This process is best done outside as dust and water are involved, Anyway place the bucket nice and level on the ground and put those gloves on, Get yourself that sieve and half fill it with gravel over the bucket of course now pour
some water over the gravel and agitate it by shaking from side to side this will help get all the gravel over all the water once the water has run through the sieve take a look at the bucket’s water pretty dirty cloudy yes!
Empty that bucket somewhere safe outside not down a drain Gravel has been known to block drains! Repeat the process of sieving until the water is running nice and clear into the said bucket, Now we have lovely clean water it’s
ready to be dechlorinated so get that second bucket ready fill the bucket with tap water and add Dechlorinator be sure to read the instructions of your particular brand as a general rule of thumb 1 drop per 2 gallons/10 liters is the usual ratio!
Let the water mix with the Dechorinator for around 5 mins and then pour over the clean gravel within the other bucket be sure to cover all the gravel by an inch or so making sure to infuse all the water around all the gravel now
we leave for 20 mins! After which time we now have the perfect gravel and it’s ready to be used within our aquarium.
Add this gravel to the bottom of a nice clean tank be sure to get about 2 inches all the way across the bottom of the tank gently put some tap safe treated tank water over the gravel we just want to cover the gravel with an inch or so
and leave for half an hour or so to settle then once the water looks clear we can pour more water in maybe a quarter to a third of the tank and leave for some time to settle now you can add decorations etc be sure to place filter etc fill tank gently make sure to cycle before adding livestock!
HOW TO CLEAN EXISTING GRAVEL IN CYCLED TANK?
As we said earlier we would look at how to clean an existing tank’s gravel let’s go! This is best done when doing a water change so weekly/biweekly is fine there are more ways of doing this but will go over what I think is the best and easiest way here are the steps needed.
- turn off filter lights heater
- gloves
- bucket
- siphon/vacuum and hose
This process is pretty straight forward and all decor and fish can be left in the tank it’s not stressful in fact most fish will be interested in what’s going on, Now we can begin we will need to place that bucket below the surface of the
tank floor is best (hopefully your tank isn’t on the floor too) as the bucket needs to be below the water for suction to take place!
Now put those gloves on it’s the fun part we place the tube/hose and attached siphon into the water and allow both ends to fill with water once they have water place your thumb over the hose end and take it out of the water and over
the bucket with the other end with your other hand (yep needs two hands) place the siphon/hoover end over the gravel an inch above or so now release the thumb from the tube end over the bucket and be ready as water will now
start to flow out into the bucket you can stop the water by replacing your thumb over the tube/hose! As soon as you have taken your thumb away from the tube/hose end start moving gently over the gravel with the other end the
siphon/hoover end we should now have suction yay! The closer to the gravel the stronger the suction so play around with it as you clean you can now dig into the gravel and move them around a little being slow and careful so as not to scare the fish or damage any plants’ decor.

As you clean and move into the gravel you will see gravel get sucked up into the siphon as this happens just gently lift the siphon/hoover up higher a few more inches above the bottom of the tank/gravels surface and the suction slows
and said gravel should fall back out keep this process going until you have moved across the whole surface and cleaned all the gravel remembering you can stop by placing your thumb over the other end in the bucket as we don’t want to lose too much water between 10 – 30 percent are most recommended.
Once finished we can remove it by yep placing a thumb over the hose gently lifting the siphon up and out of the tank we just need to get rid of that dirty water and replace it with fresh tap-safe water back into our tank!
IN CONCLUSION
In conclusion, I hope you agree with me that substrate is both needed and important and that gravel can aid in the health and care of both the fish’s wellbeing and the health of the tank too via biological filtration! Also, I hope we can
agree that YES aquarium gravel does need washing both before we use it and continually once in our tanks thanks for reading, and hope you enjoyed the read.
Leave a Reply